Making quality prints (panorama for my cubicle)
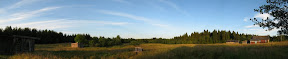
I had a bunch of photographs from my 2006 trip that I wanted a panorama made of. Finally found some time. I used one of less sophisticate tools available, one that came with my Canon camera. Then I had trouble trying to find software that would let me print this big photograph over a sequence of pages that I would be able to glue together.
Solution was pretty counterintuitive. I used Nero Digital to adjust brightness of the image (everything looks darker on the paper than it does on screen, so, just a little bit lighter). I then discovered that my printer's (I still use the cheap Epson 777 with non-Epson ink I bought off the Internet) driver is capable of exactly what I wanted, I set the multi-page option to print a Poster over 9 pages. What I did then was just set zoom to fit page in Nero, and when preview came up I had to un-select the blank pages and be done. So, from my other experiences this day:
Solution was pretty counterintuitive. I used Nero Digital to adjust brightness of the image (everything looks darker on the paper than it does on screen, so, just a little bit lighter). I then discovered that my printer's (I still use the cheap Epson 777 with non-Epson ink I bought off the Internet) driver is capable of exactly what I wanted, I set the multi-page option to print a Poster over 9 pages. What I did then was just set zoom to fit page in Nero, and when preview came up I had to un-select the blank pages and be done. So, from my other experiences this day:
- Clean the printer! Over the years of irregular use too much tar-like gunk accumulated on the leads and rollers. I spoiled two pages of HP Premium Glossy paper to this...
- Print a few drafts on plain paper to adjust brightness. No need to waste ink printing entire page, a quarter or a third of a page will give good enough impression of what the final thing will look like.
- Print the resulting panorama one page at a time. This helps to avoid possible malfunctions where two pages get fed into the printer, any kind of misalignment, etc.
- Don't bother to use genuine, original inks. Cheap compatible cartridges work just fine.
posted by denka at 5:30 PM
![]()

0 Comments:
Post a Comment
<< Home